Welcome to my Senior Studio II project at Savannah College of Art and Design. My project – BlownUp – is to make a realistic explosion(s) that can be composited into live-action footage or placed in a realtime environment. The blog is read from top to bottom. I hope you enjoy.
LOG I
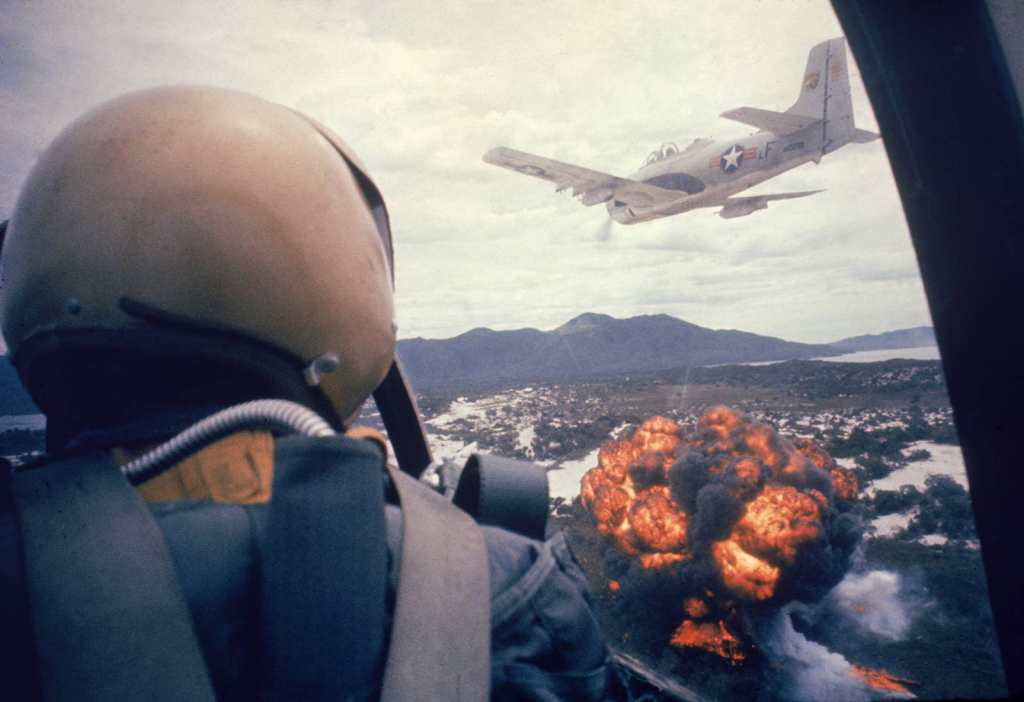
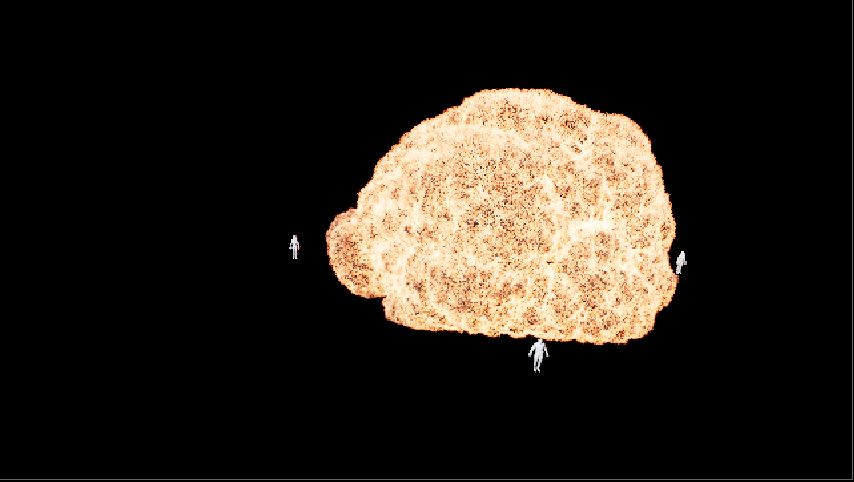
Once again, war footages was the source of inspiration for my projects. In fact, I found the inspiration from the image:
I also made a Gantt chart to serve as my schedule and keep track of my progress, here is the live link: https://docs.google.com/spreadsheets/d/1RhmkxcKuMglvpJ5IQwmBj4SdKKPzhbOP4n2M8bnDRnQ/edit?usp=sharing

After looking intensively for references, here are what I have narrowed down:
- https://www.youtube.com/watch?v=Xe2OtSnBYb8
- https://www.youtube.com/watch?v=ZHPa0upQdRQ
- https://www.youtube.com/watch?v=w1aRQrH0PPY
- https://www.youtube.com/watch?v=uD_P8giGSDc
- https://www.youtube.com/watch?v=YtCTzbh4mNQ
- https://www.youtube.com/watch?v=ESWCzPy7SgQ
- https://www.youtube.com/watch?v=vK_WDxjhu0Y
- https://www.youtube.com/watch?v=Vt2Lsyy7uZA
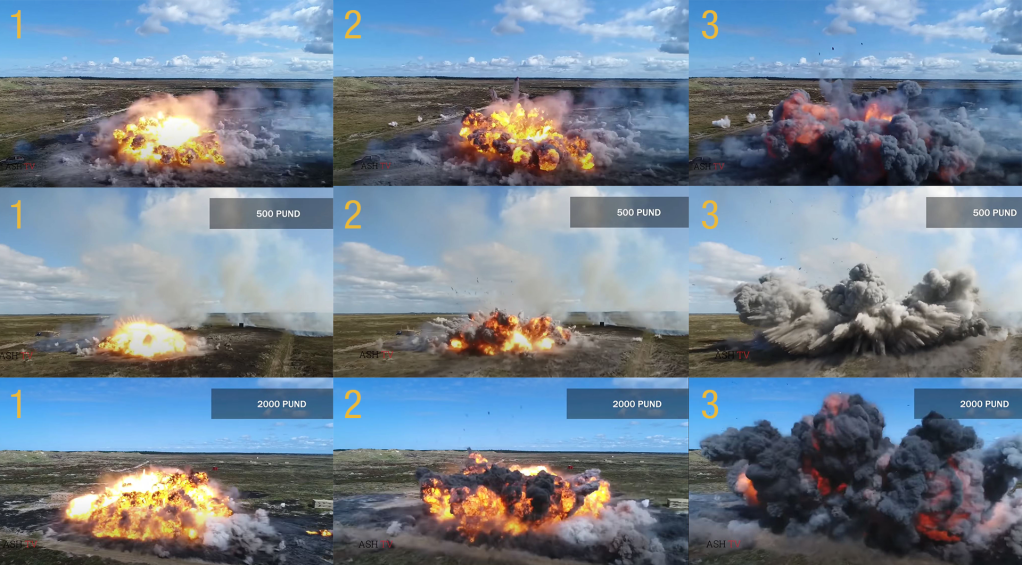
But I decided to go with this, a missile explosion (a 500 pound at 0:16)
LOG 2
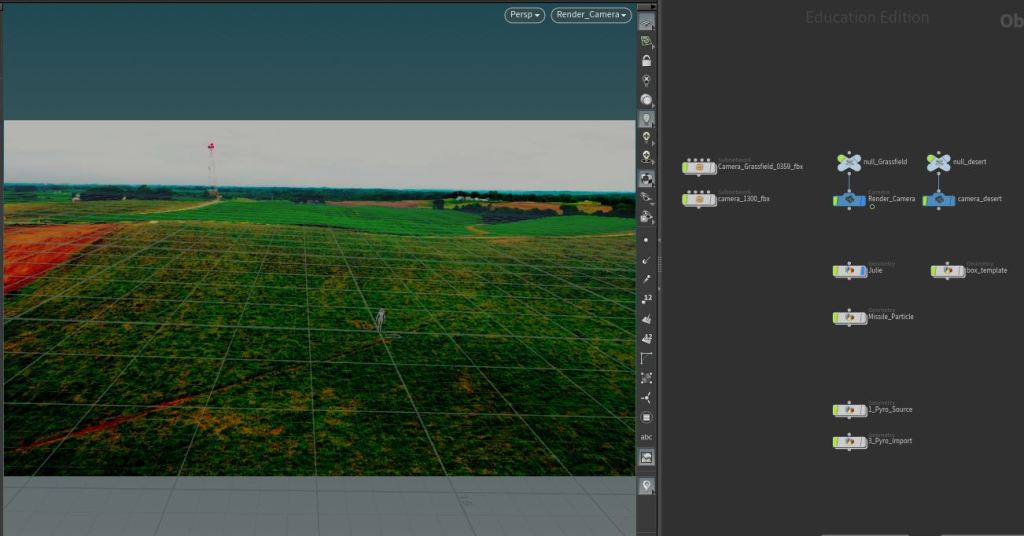
I re-selected my live-action plate from Pexel videos. I reversed it, then tracked and exported camera data from Nuke to Houdini.
LOG 3
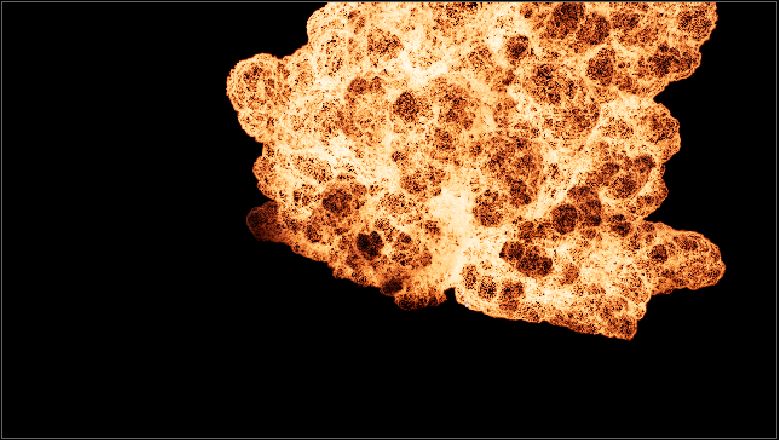
I also tested out 3 shelf tools set-ups from Houdini to get an idea. First is the Explosion tool with the (Classic) Pyro Solver, second and third are the Aerial Explosion and the Ground Explosion using the Pyro Solver Sparse.
The Classic Pyro setup uses 3 fields fuel, temperature, and vel field; while Sparse Pyro uses temperature, vel, burn as flame, and divergence, or just divergence field. I noticed in the source there are burst source and trail path source made separately then merged together. However, all three setups are pretty low-resolution and do not use any micro-solvers for details.
So I tried both method as to make my own source from particles and using ‘trail-burst-source’. However, I won’t be using Pyro SOP Solver in order to learn things myself inside a DOP network, but I do keep the Pyro SOP Solver at hand for suggestions. Here is what I have after setting up the volume source, some settings in the Pyro Solvers, and started playing with Gas Disturb.
Password: explosion
LOG 4
I read up on Houdini TOPs from CGwiki’s and managed to set up some wedges, a ropfetch node for caching, an opengl to write out flipbook frames, partition-by-frame, imagemagick, and ffmpeg to write out .mp4 files.
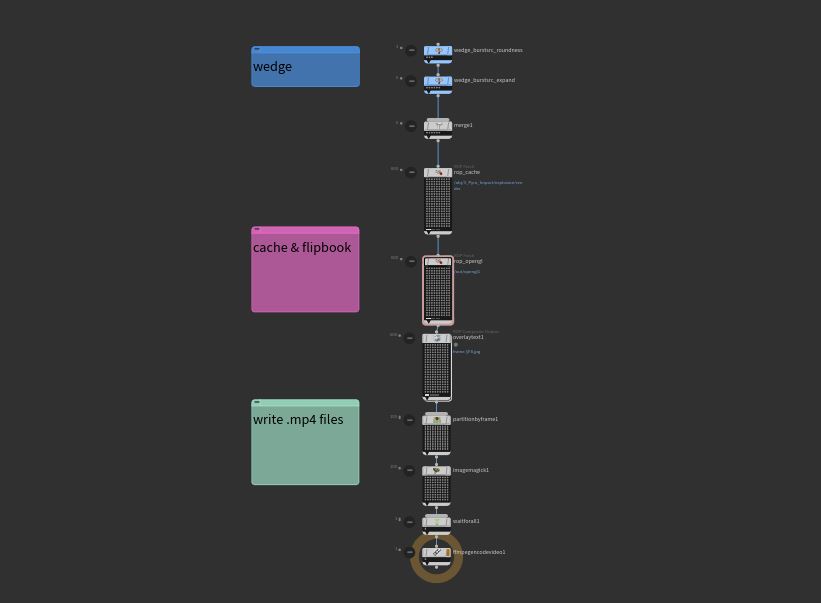
However, due to the many attributes I needed to wedge, if I proceed to wedge all of them together, pdg would generate way too many sims even though gave the artist like me the control of each setting. So I decided to split up into multiple hip files and wedge 2-3 attributes at a time, with the other attributes set at a default value. I compiled flipbook files into .mp4 to view but also kept the wedge caches to check back on the sim. The iterations go on as I narrow down the result I wanted.
LOG 5
The attributes that I included in my wedgings are:
pyro burst source, particle scale
[volume source] acceleration scale, divergence scale
[micro-solver] disturbance, turbulence, dissipation
[solver] flame lifespan, buoyancy, smoke & temperature amount, and expansion rate
I collected multiple comparison videos of the wedges and for the sake of demonstration, below is one which I tested expansion (buoyancy & expansion rate)
Password: explosion
LOG 6
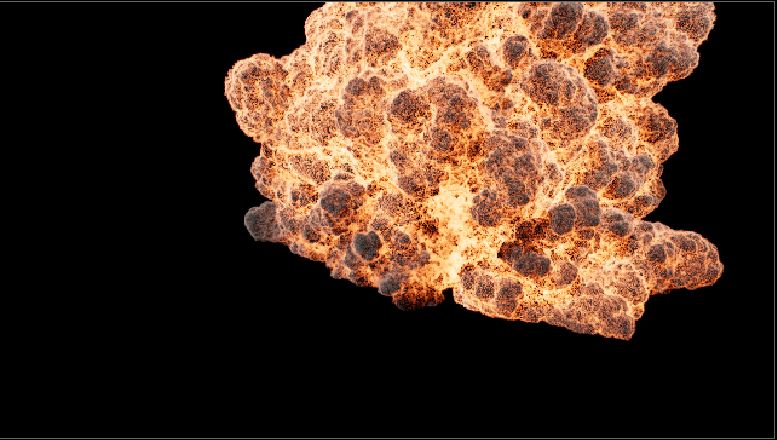
I evaluated my batch of wedges, and simulated again to come to this result.
Password: explosion
However, this is not the result I aim for. I will need to change the source to be more scattered, have less disturbance, less divergence and buoyancy.
Before I go back to simulating a second batch, I set up the pyro shader using the ‘pyro bake volume’ node, as well as a mantra node to export extra image planes (AOVs) for compositing later. I’m gonna set up a Nuke script in which I will do some post-processing steps as well as adjusting AOVs, and then start more simulation iterations.
LOG 7
- Setting up ACES workflow:
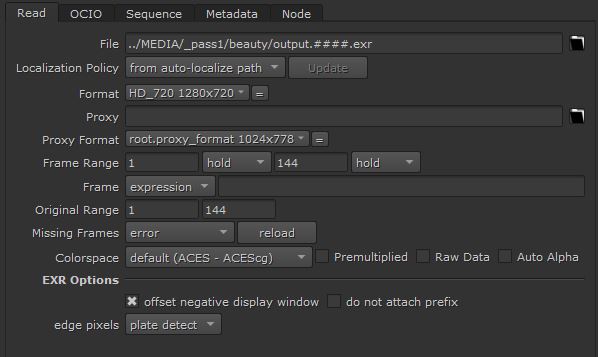
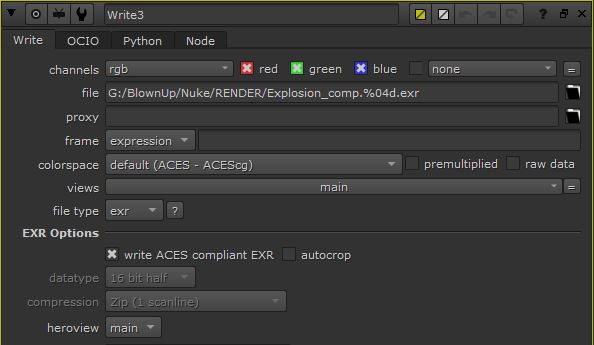
I should have done this earlier when I started, but now, rather late than never. To set up ACES, I changed the properties in the color tab of Nuke to ‘OCIO’ and the colorspace is
I also wrote out ACES-converted proxy plate files to bring into Houdini for visualization. As for textures, this is just in case you need to know, anything that appears to have color on the scene will need to be converted to ACES-compliant linear EXR files, but textures with only information pass like roughness, metallic, normal and be brought directly into Houdini.
- Set up a rough compositing file:
With the test renders from my previous log, I brought them into Nuke and shuffled out the channels of each light, as well as the pyro_scatter. I will also need to bring in the shadow pass render for my explosion.
Since I splitted the passes up, I could have direct control on each pass, then merge them back together with “difference” function for the lights. With the pyro_scatter pass, I also merge “difference”, and, after three separate streams of adjustments like glow, colorcorrect, grade, hueshift, I “plus” them in to the original stream (B line).
LOG 8
In my Nuke script, I adjusted the project settings to go with ACES, and change the settings for my read node (input) and write node (output) to conform to ACES.

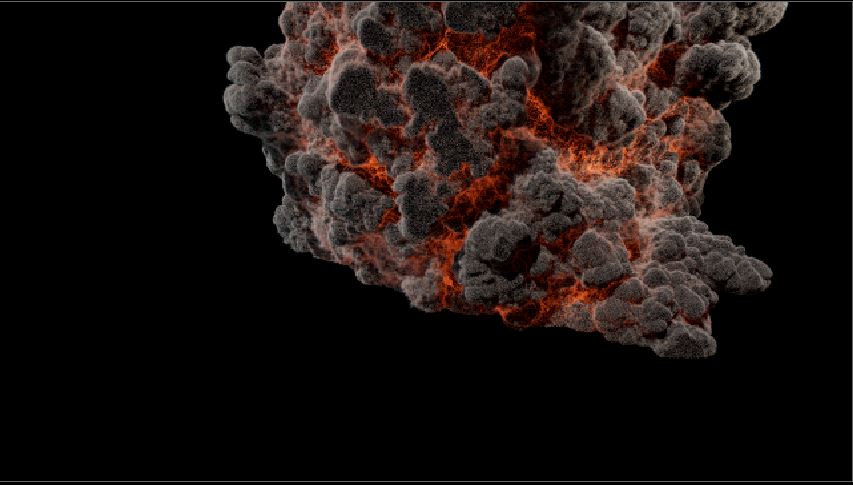
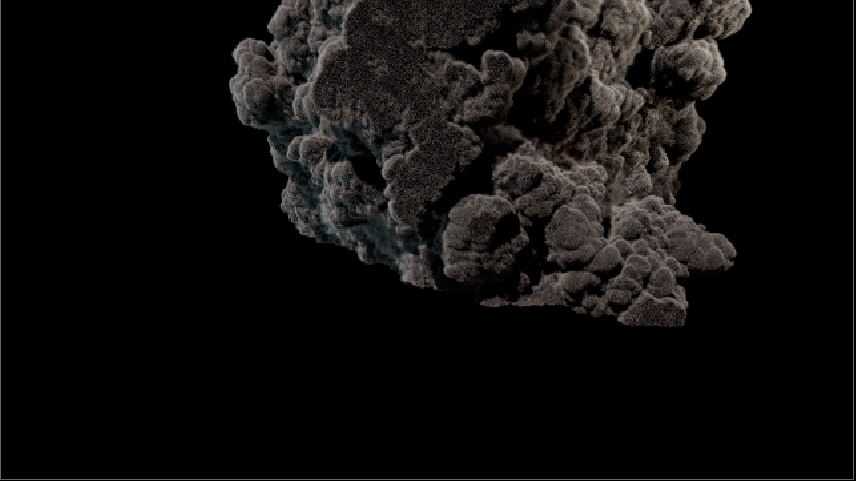
Besides, I also rendered out a beauty pass and a shadow pass for a rough composition, besides adding some color correction and some glow to the explosion. However, this render is from a previous simulation pass, in which there was a little too much disturbance, turbulence was a little out of hand, the smoke hit the domain box, the fire cooling rate needs to be faster, and there’s yet any secondary simulations. Here’s the video:
Password: explosion
LOG 9
I tackled the issues I mentioned above in log 8. After getting some feedback, I was trying to achieve the initial “punch” in the explosion as it starts off abruptly and eases out. So I was testing for either keyframing ‘timescale’ (left), or ‘expansion’ (right).
I’m currently working on secondary sims like adding trails to the main sim, shockwave, and maybe white smoke. I also need to improve the lighting on my scene, for which I’ve spent some time digging HDRs from HDRI Haven.
LOG 10
I’ve improved the main sim. However the trails are not looking right, and the shockwave is not included yet. After a slow week post-vaccination, I’ve missed a few checkpoints for sims but will catch up. I changed my lighting setup, and added a shadow matte render layer. In comp, I also colorcorrected my place, and of course put the render layers together. So here’s my 2nd render pass. In retrospect, I feel that I could get better results from the trails being a separate sim, so it has settings of its own.
Password: explosion
LOG 11
Small update: here’s my shockwave sim. Even though I’m still doing wedges, the goal is to add more speed and probably more dissipation; or the smoke density would be quite thin to match my reference.
Password: explosion
