Welcome to my Senior Studio I project at Savannah College of Art and Design. My project – GAMEOVER – is about a shot-down WWII German aircraft crashing into the ocean. As you scroll down, you will find newer loggings of the project. I hope you enjoy.
LOG 1
I modeled the airplane Messerschmidt BF109, and with the help of my amazing lookdev and animator friends, had it animated and textured. Here are their sites: Thinh Nguyen Tristan Tri Nguyen
Prior to this class, I took Rebelway’s Water FX class, and I have learnt a lot from that class with Igor Zanic’s feedback. And now I attempt this project to brush up on and sharpen what I have learnt.
I also prepared my project proposal, and here’s the slide link for anyone who is interested:
https://drive.google.com/file/d/1_ey1RtJ_7ALVcSDgBxhaN54svYNu6rHd/view?usp=sharing
And here’s the link to the animation, password: Shot5_Anim
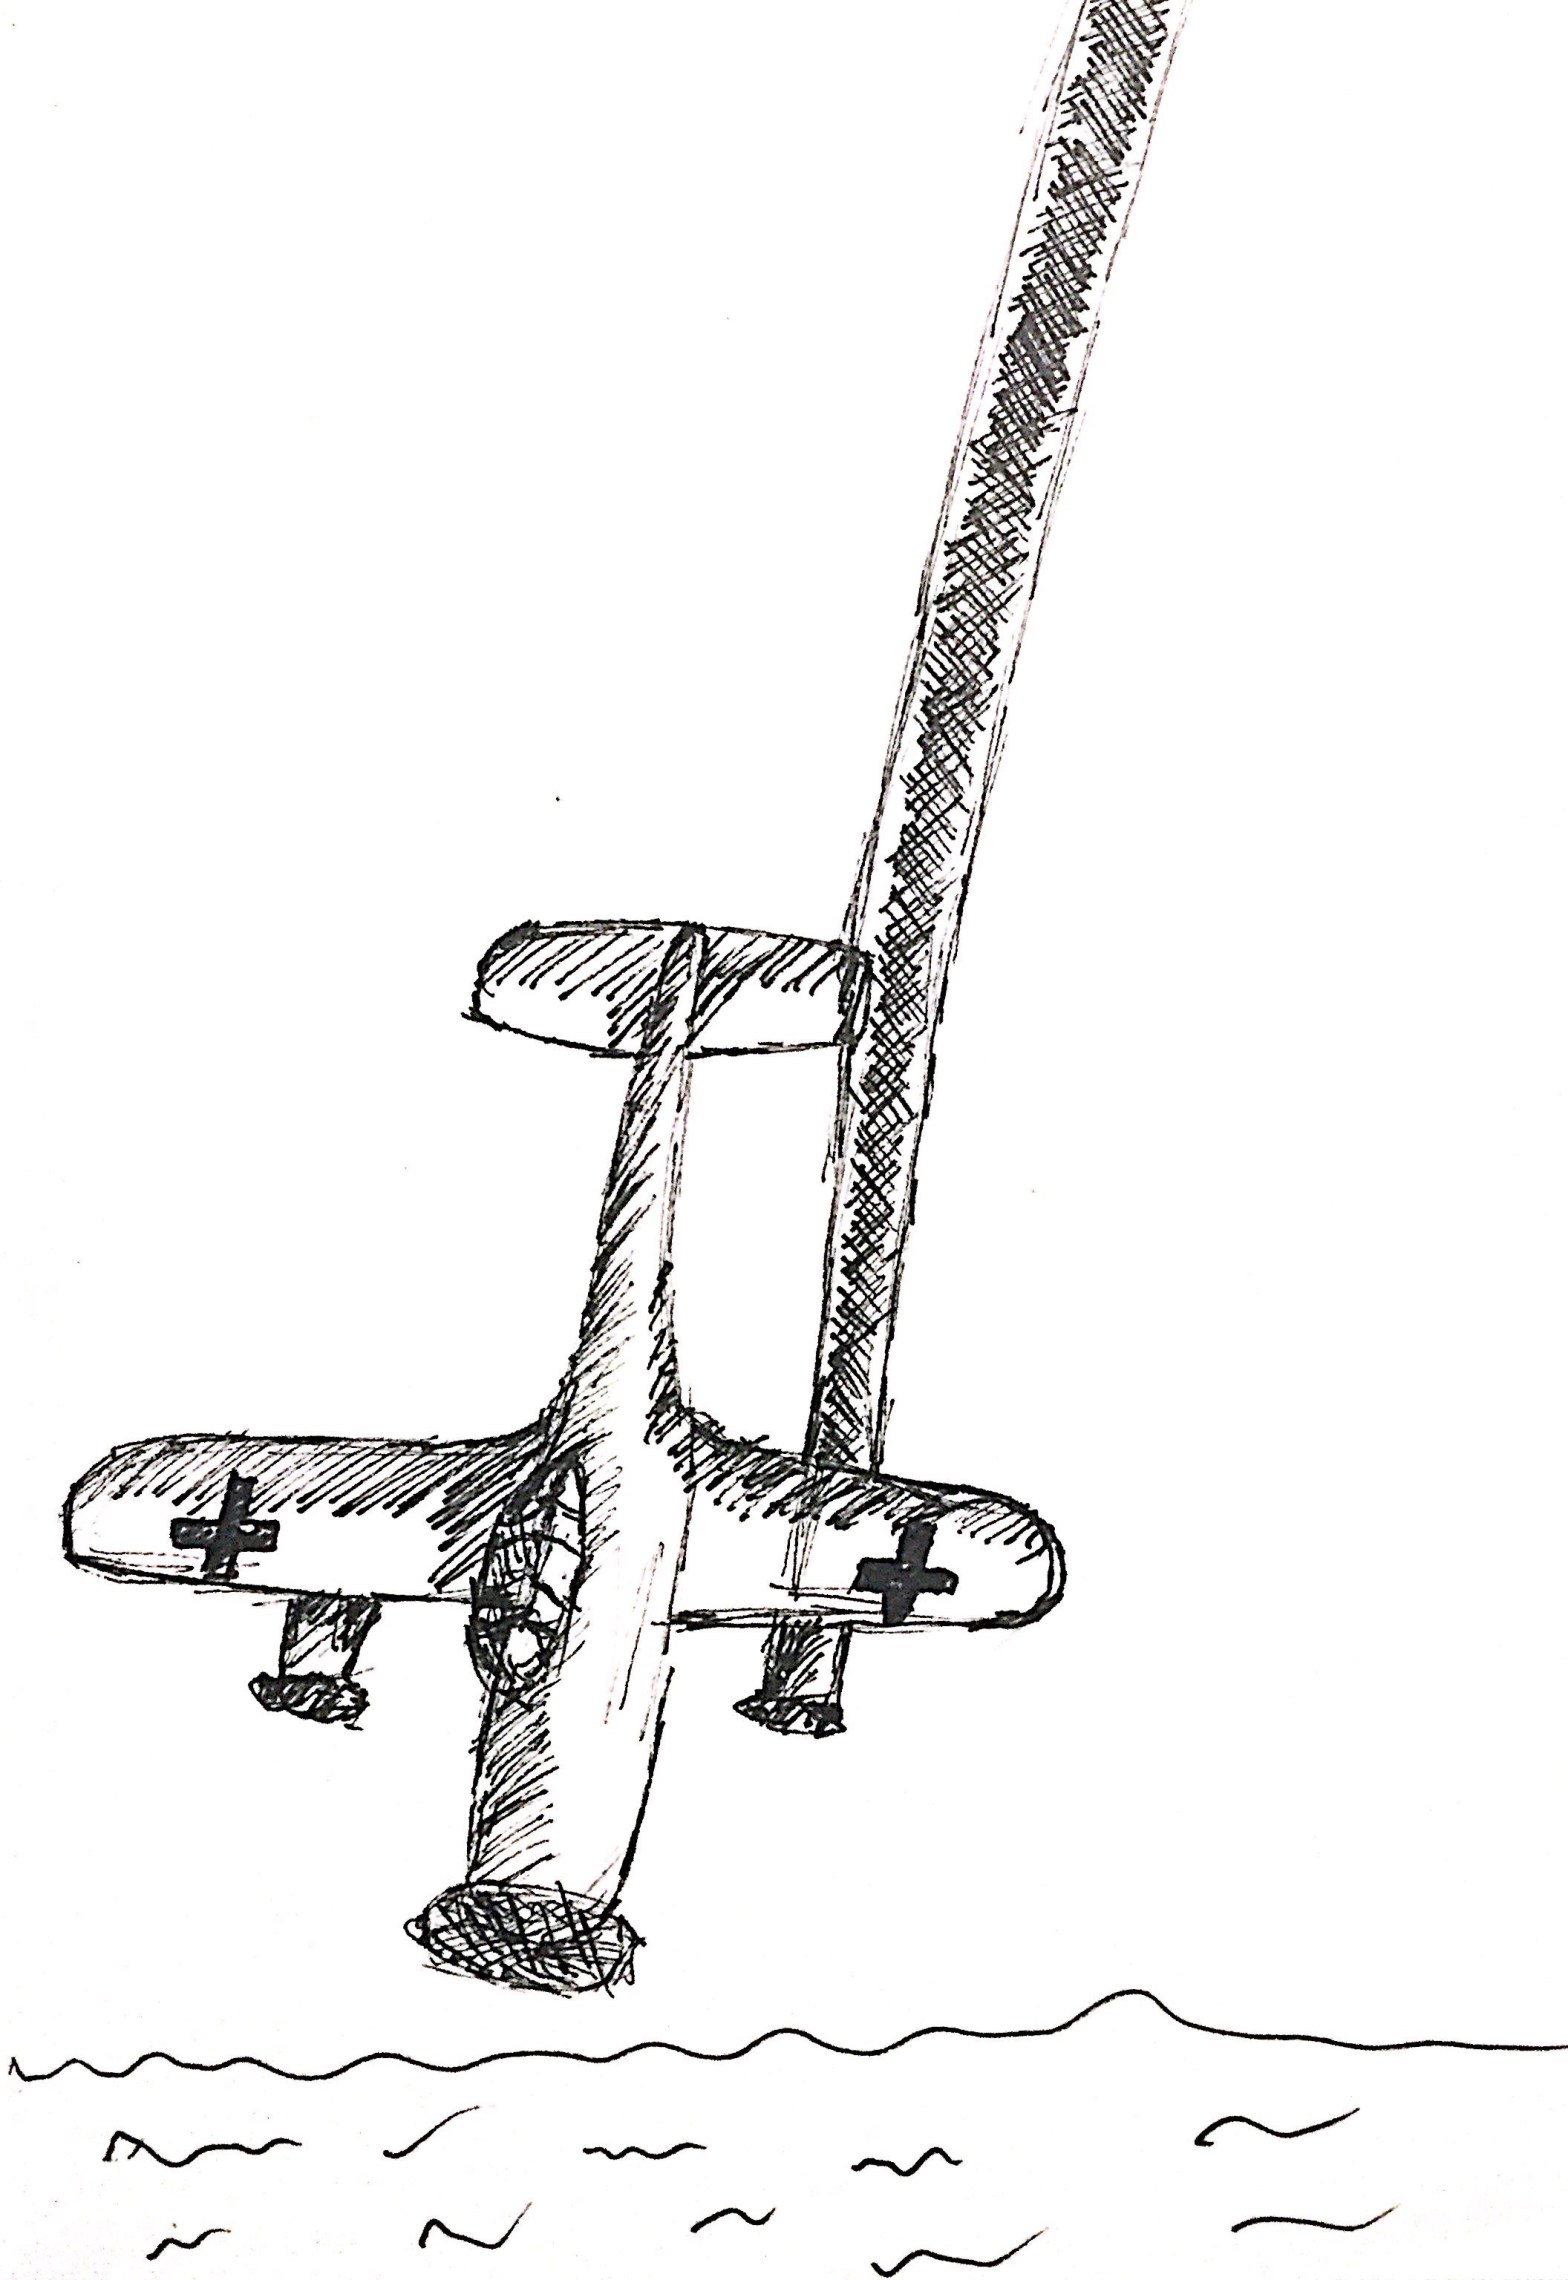
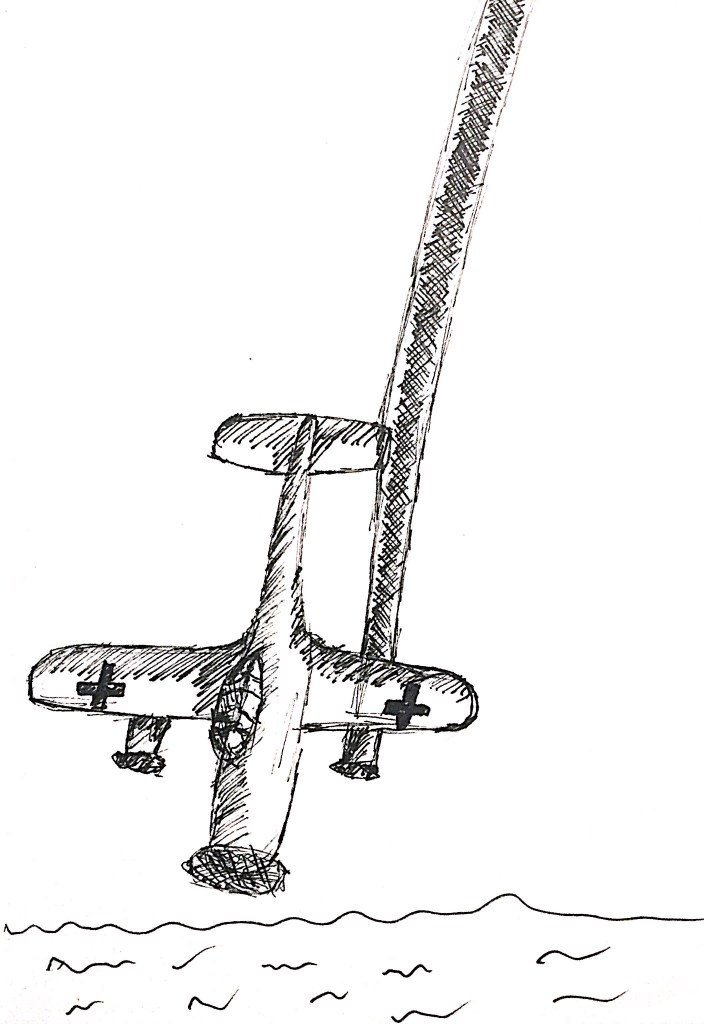
Below is my inspired reference. Now let’s get down to some Effects!
________________________________________
LOG 2
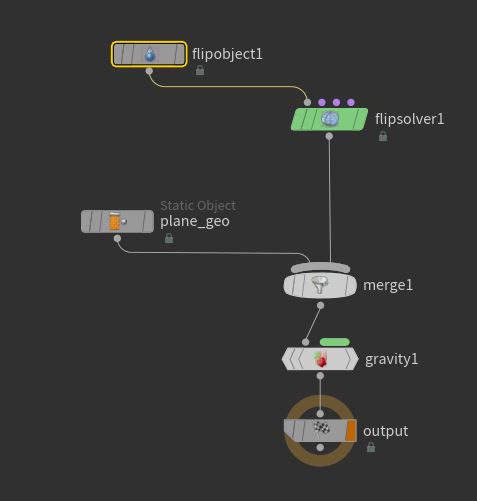
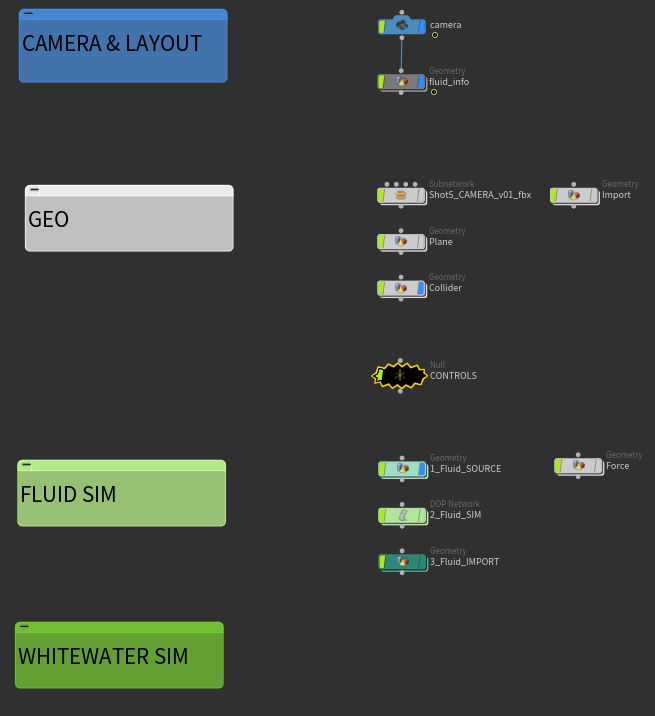
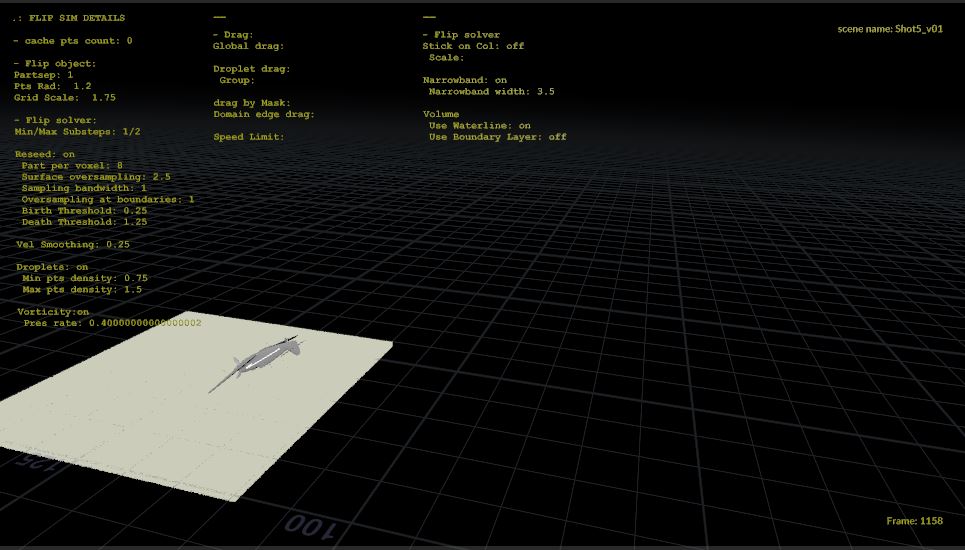
I’ve fixed and finalised the animation of the aircraft. From Maya, I exported the Camera FBX and the animation Alembic, then imported them into Houdini. I’ve been setting up the Houdini scene by timeshifting the animation frames from 0-240 to 1000-1240, making some basic controls for the FLIP fluid simulation. I also added some info on the screen to make it easier when I test out settings for my sims. So here’s what I have:
________________________________________
LOG 3
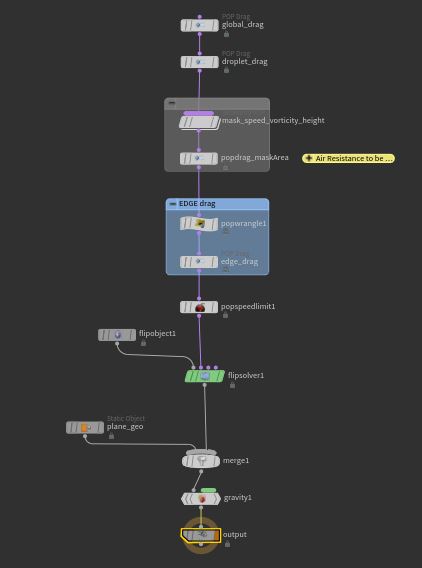
Over the past week, I’ve updated my setup for the fluid simulation. Compared to the initial setup, I added velocity control for the plane (collision object), global drag, droplet drag, and speed limit. I also enabled “Vorticity”, for which in order to correctly view velocity and vorticity together after caching, I applied the velocity/vorticity display Attribute VOP that I learnt from Igor Zanic.
I’ve also tested out different settings of the fluid simulations. I was simulating at 0.06 particle separation, which is half my intended final High Quality version. And the results showed that simulating water indeed took a lot of time, so much that I had left 2 computers running the sims for 2 days.
Some of the important settings, which I deemed important, I decided to show includes Birth/Death rate, the Surface Oversampling in the Solver’s Reseeding tab, the Velocity Smooth of Particle motion, and the Speed Limit in PopSpeedLimit.
Here are links of the flipbooks. Thanks to those, I found of problems that I need to fix and got the settings that I intend for the shot.
The password for all 4 videos is: fluidsim_pass1
________________________________________
LOG 4
While this logging was being written, the high-resolution version fluid was being simulated. After I adjusted the settings from previous wedging simulations, I’ve updated the pass 2 of my fluid sim, which is still a mid-res sim of 0.06 particle separation. Yet thanks to this, I’ve realized some minor tweaks I could do.
Password: fluid_pass2
Later in the day, I’ve learnt from hindsight with my 2nd Pass that the water splash was too big for the scale of the aircraft, as well as some other minor adjustments. So I fixed them and put out a 3rd Pass. For now, I’m testing different keyframing values of the plane velocity upon hitting the water.
Here it is, password: fluid_pass3
________________________________________
LOG 5
Here, I optimized the simulation domain, as well as varying different velocity.
Password: fluid_pass4
Then, I did the High-Res simulation, which is also my Pass 5. After 5 passes, the fluid behavior is not as drastic as before, and after I have consulted with my Professors and friends, this is probably the greenlit version. Special thanks to Professor Deborah Fowler, Igor Zanic, my friend Felipe Amaya, Hoang Thinh Nguyen for their feedback.
Password: fluid_pass5
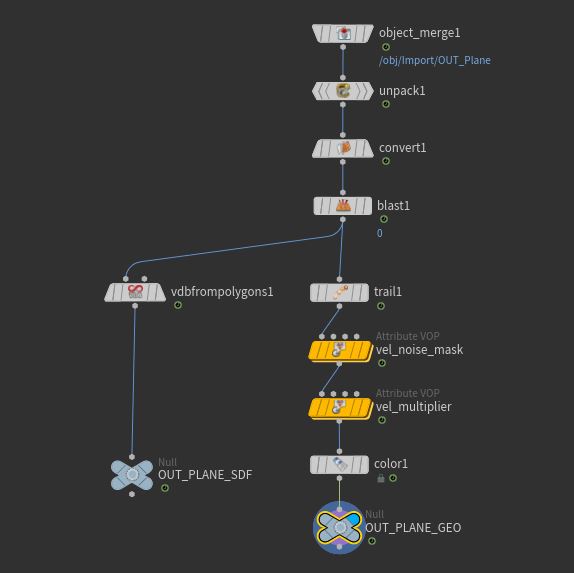
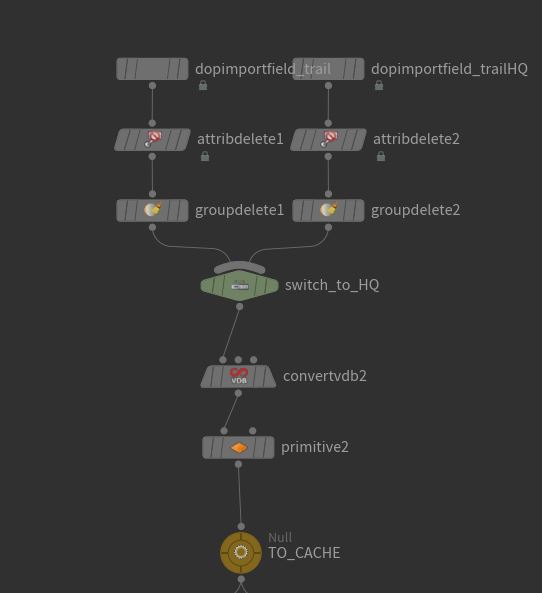
After having completed the simulation, I turned the fluid sim from its three fields into vdb from particle fluid and then polygon meshing, at the same time reserving its velocity and vorticity attribute. I also extended the simulation domain edge so it’s easier to visualize the infinite ocean of the scene.
Password: fluid_meshing
________________________________________
LOG 6
WHITE WATER SIMULATION
I tested out all the possible source settings for whitewater source, namely curvature, vorticity, acceleration, and all combined. Red is curvature, Green is acceleration, and Blue is vorticity. Based on my reference video, a lot of the water splashing in the air is probably spray generated by velocity and, maybe, vorticity in the air. However, the reference does not give account of how much whitewater there is in the secondary small waves on the water surface so I have to feel it out.
Judging from the look of the sourcing test that I currently have, I like the look that curvature (red) and acceleration (green) gave me. Limiting the range of acceleration would be nice, and vorticity could be less dense, I shall test with two settings mixed together at a time. But of course, an OpenGL preview may not give as accurate a result as doing the simulation itself, so I might have to pick one that suits my goal and try the sims out.Below is the video.
Password: wwr_source
________________________________________
LOG 7
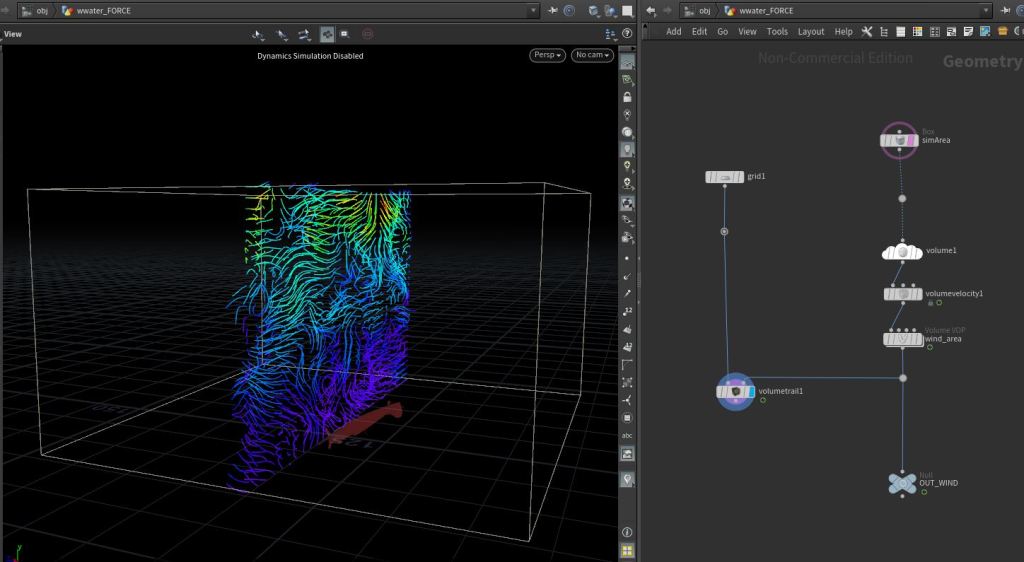
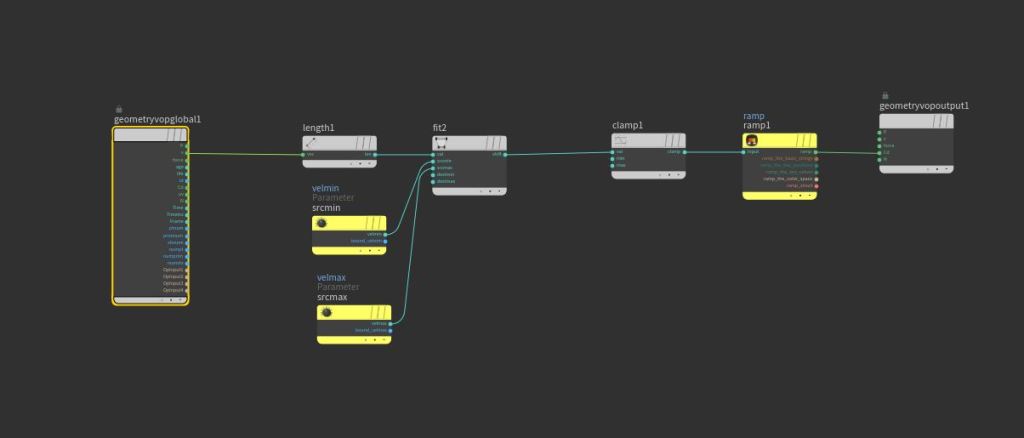
Last LOG, I tested out different sources for the whitewater simulation. For this one, the simulation dopnet was set up with global drag, drag by masks, some noise based on height, edge drag for the sim domain, and pbfstiffness on the particles. Then an external whitewater force (curl noise) was added. Afterwards, when importing the sim back into object level, I made an Attribute VOP for whitewater preview based on its velocity.
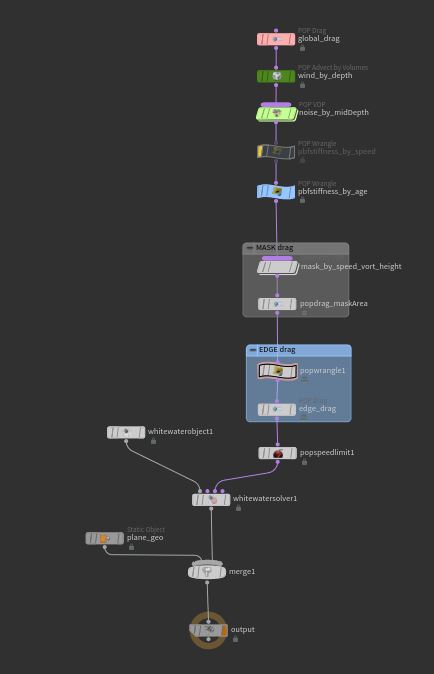
I did various wedges with the simulation settings for the whitewater sim. Some of the settings include: advection strength, velocity multiplier, clumping constraint stiffness, erosion, repellant strength, adhesion, speed limit,… These will affect how much whitewater is spawn, the velocity of the sim, how quickly the whitewater erodes, the shapes and formation of the repellants that form on the surface. Next step I would apply the right settings for my simulation, then re-simulate to get a better result. Some of the wedges are below.
Password: wwr_wedges
________________________________________
LOG 8
I applied the simulation settings from the wedges. Below is the pass 2 that I put into together with the fluid mesh. I do not have a lot of update for this log, as I’ve mainly been tweaking to my sim and waiting on the result.
Password: wwr_pass2
________________________________________
LOG 9
SMOKE TRAIL SIMUlATION
I decided to tackle the fluid-related simulations first knowing that I would take a lot of time to sim and I did. I got to the current point that you can see in my previous log, although I’m not 100% happy with it, it’s doable for me to move on since I have a timeline to follow.
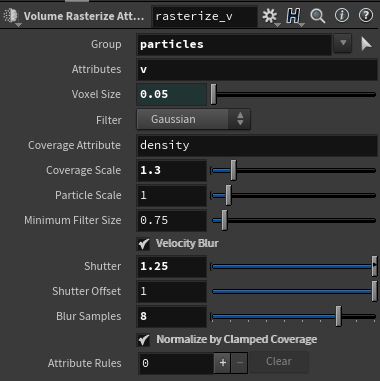
Before the plane crashes into the ocean, it flies and glides in the air, during which time it emits a smoke trail which I’m tackling next. With Houdini 18, I have never tried the new Pyro Sparse Solver so I plan to try it out. The last time I did something with Pyro was in Houdini 17.5. So after doing some research, I found out that for flames, the attribute to rasterize Houdini use for input is “burn”, but for a smoke trail, it is still “density”.
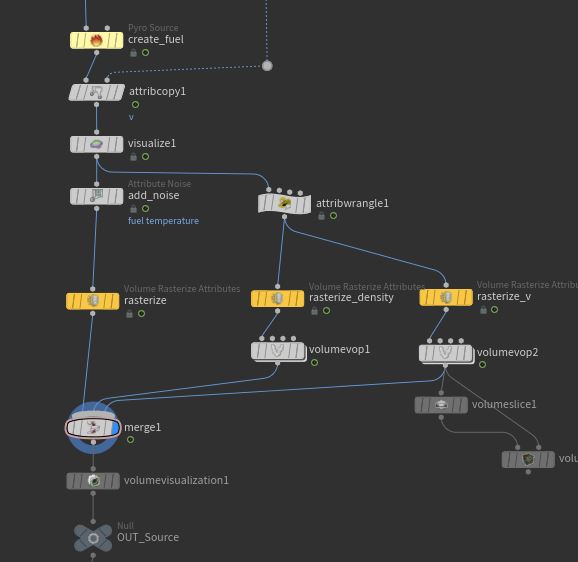
I set up the smoke trail source by taking the tail part of the plane, cut it, and made a pyro source out of it. The velocity was transferred from the animation back to the points and added a multiplier. I rasterized density, velocity, and temperature separately to control them better. In smoke import bucket, I optimized file size for caching by turning the sim into vdb and writting out 16-bits with.
Below is the simulation without any microsolvers, I made the dop network like a usual one, but with sparse object and solver.
Password: trail_wedges
________________________________________
LOG 10
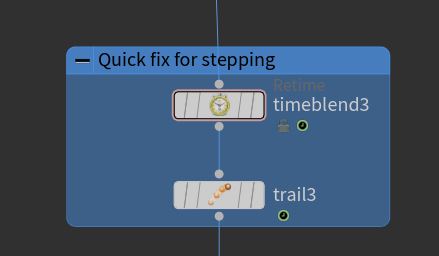
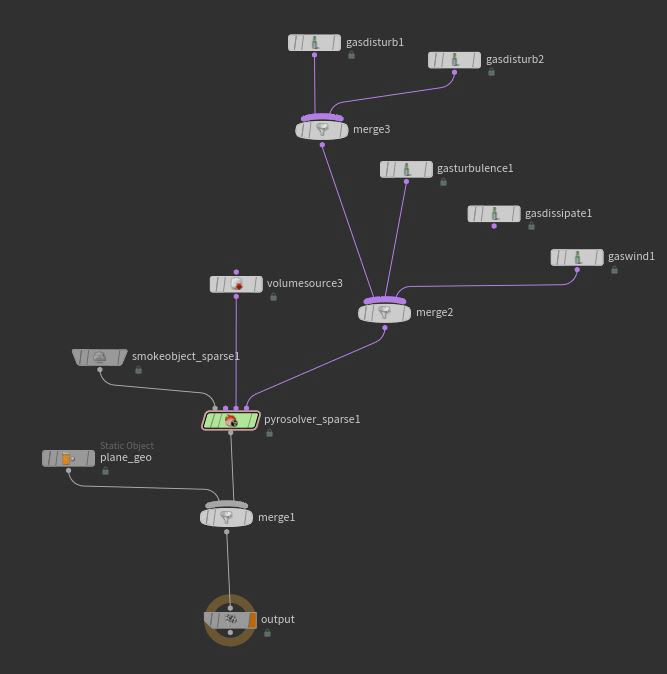
For the trail simulation, I added some microsolvers including disturbance, turbulence, dissipation. Before I started doing any wedges, I let the sim run without microsolvers to see any problems. There was, apparently, some stepping in the scene as the source was instantiated. So, velocity blur was introduced in the volume rasterize node. Yes, that helped decrease the stepping, but there were still chunks of mushroom smoke coming out. I thought the last resort was to increase more stepping for the simulation, but that meant more sim time. After some consultations, I found a work-around that used a timeblend and a trail sop to extend the source, which actually did the job.
Next, I did wedgings to find the right settings, but nothing was very different. Luckily, my friend Felipe Amaya suggested that I try more intense values of the disturbance, turbulence and add some gas wind to the sim. With the scale of my airplane and my scene, the minimal settings that are usually used for microsolvers didn’t work. So desperate time called for desperate measures. I did new passes of wedges with more intense settings, with a wider range. It worked.
________________________________________
LOG 11
More passes were put in with changes even minimal to find the right look. I couldn’t keep count of how many passes I did for this trail, but there were definitely a bunch of wedges. My process was to vary one attribute, keep everything else the same, go from the source to solver, then microsolvers. Here they are, the attribute being tested is shown on each video; they might entertain you.
Password: trail_wedges
At this point, I kinda got stuck and did not have a clue what could affect the trail so substantially. I decided to go back and wedged the microsolvers separately. I noticed how each behave differently and was affected by block size and swirl size. So I improved on that.
________________________________________
LOG 12
By trials and errors, I got the simulation to a point where it looked better than it started, or say it’s getting there. It was not crazy swirling nor was in punching big steps of smoke into the air. At this point, I simulated and compared different substeps and what a lower division size (more resolution) would do. Although the smoke was at a very high speed due to the fast animation, it trailed and dissipated nicely. Below, I also include the flipbook for a trail sim of debris falling out from the plane.
Currently, I think I would move forward and test some shaders. So, heads up for next LOG!
Password: trail_wedges
